The Seeburg Big B
I recently started on what I thought was an HSC3. After talking with a buddy it turned out to be a 6000, a later home stereo version of the LP playing console. My first. After lugging the mechanism onto the bench from the shed today I nicknamed it the Seeburg Big B or Big Bastard. I had to take the tormat and record rack off inside the hot shed just to be able to get a handle on carrying it. It may be fall in the rest of the country but here in Texas the temperature on a sunny day is still getting into the 80’s. Magnify that with a metal shed and it’s a sweaty job.
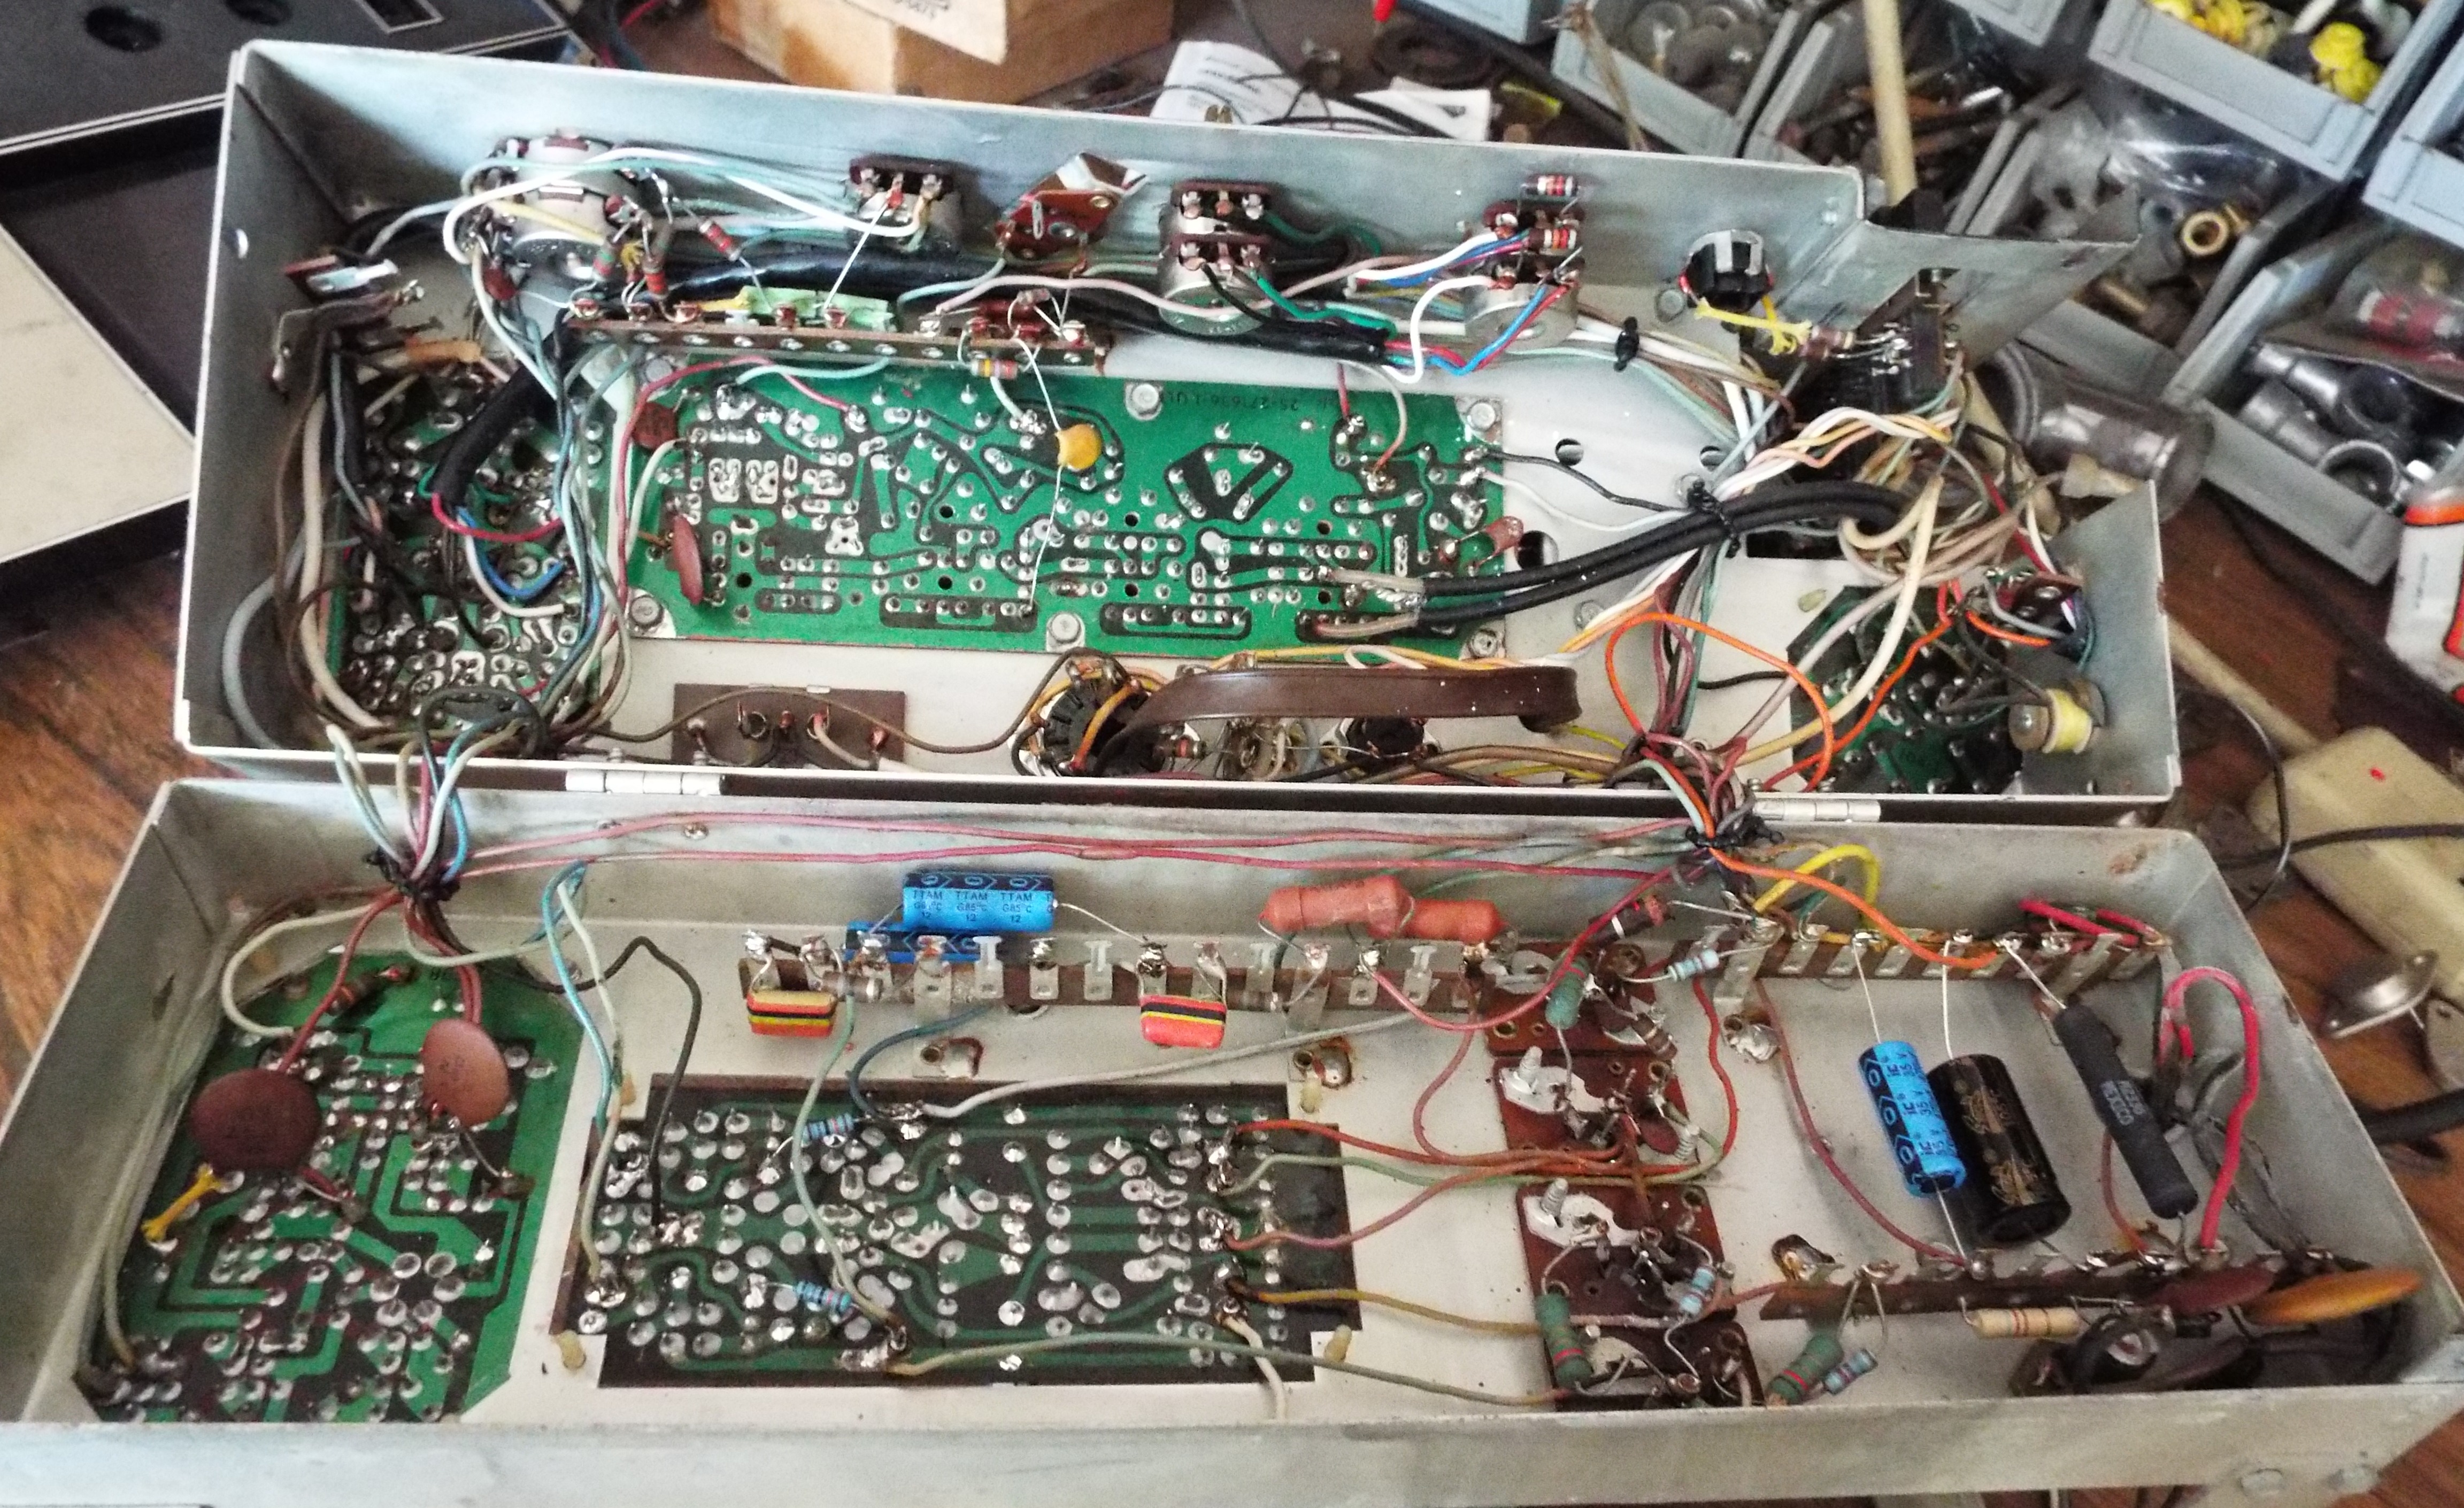
After finishing the SMC3 I poked around getting a few things in order like lining up all the tonearm assemblies, tearing a few down, and getting the rest in one spot. Poked around the shop straightening up here and there. Just trying to figure what to start next. I dragged the amplifier/radio piece for the 6000 onto the bench and examined it trying to figure out how and where to start. I hooked it up to speakers and an input and tested it. It had volume but one channel was extremely weak. This is very typical. As old as this unit is all electrolytic capacitors have to be replaced. This is actually the SR500 or Stereo Receiver…It has a cover with the selector buttons in addition to the radio, tone, and volume controls. I was pleased to discover that after taking the cover off this unit will open in half. It makes access to the boards inside much easier. It is still quite a job having to recap several small boards. I actually de-soldered several wires to two of the boards so I could remove them.
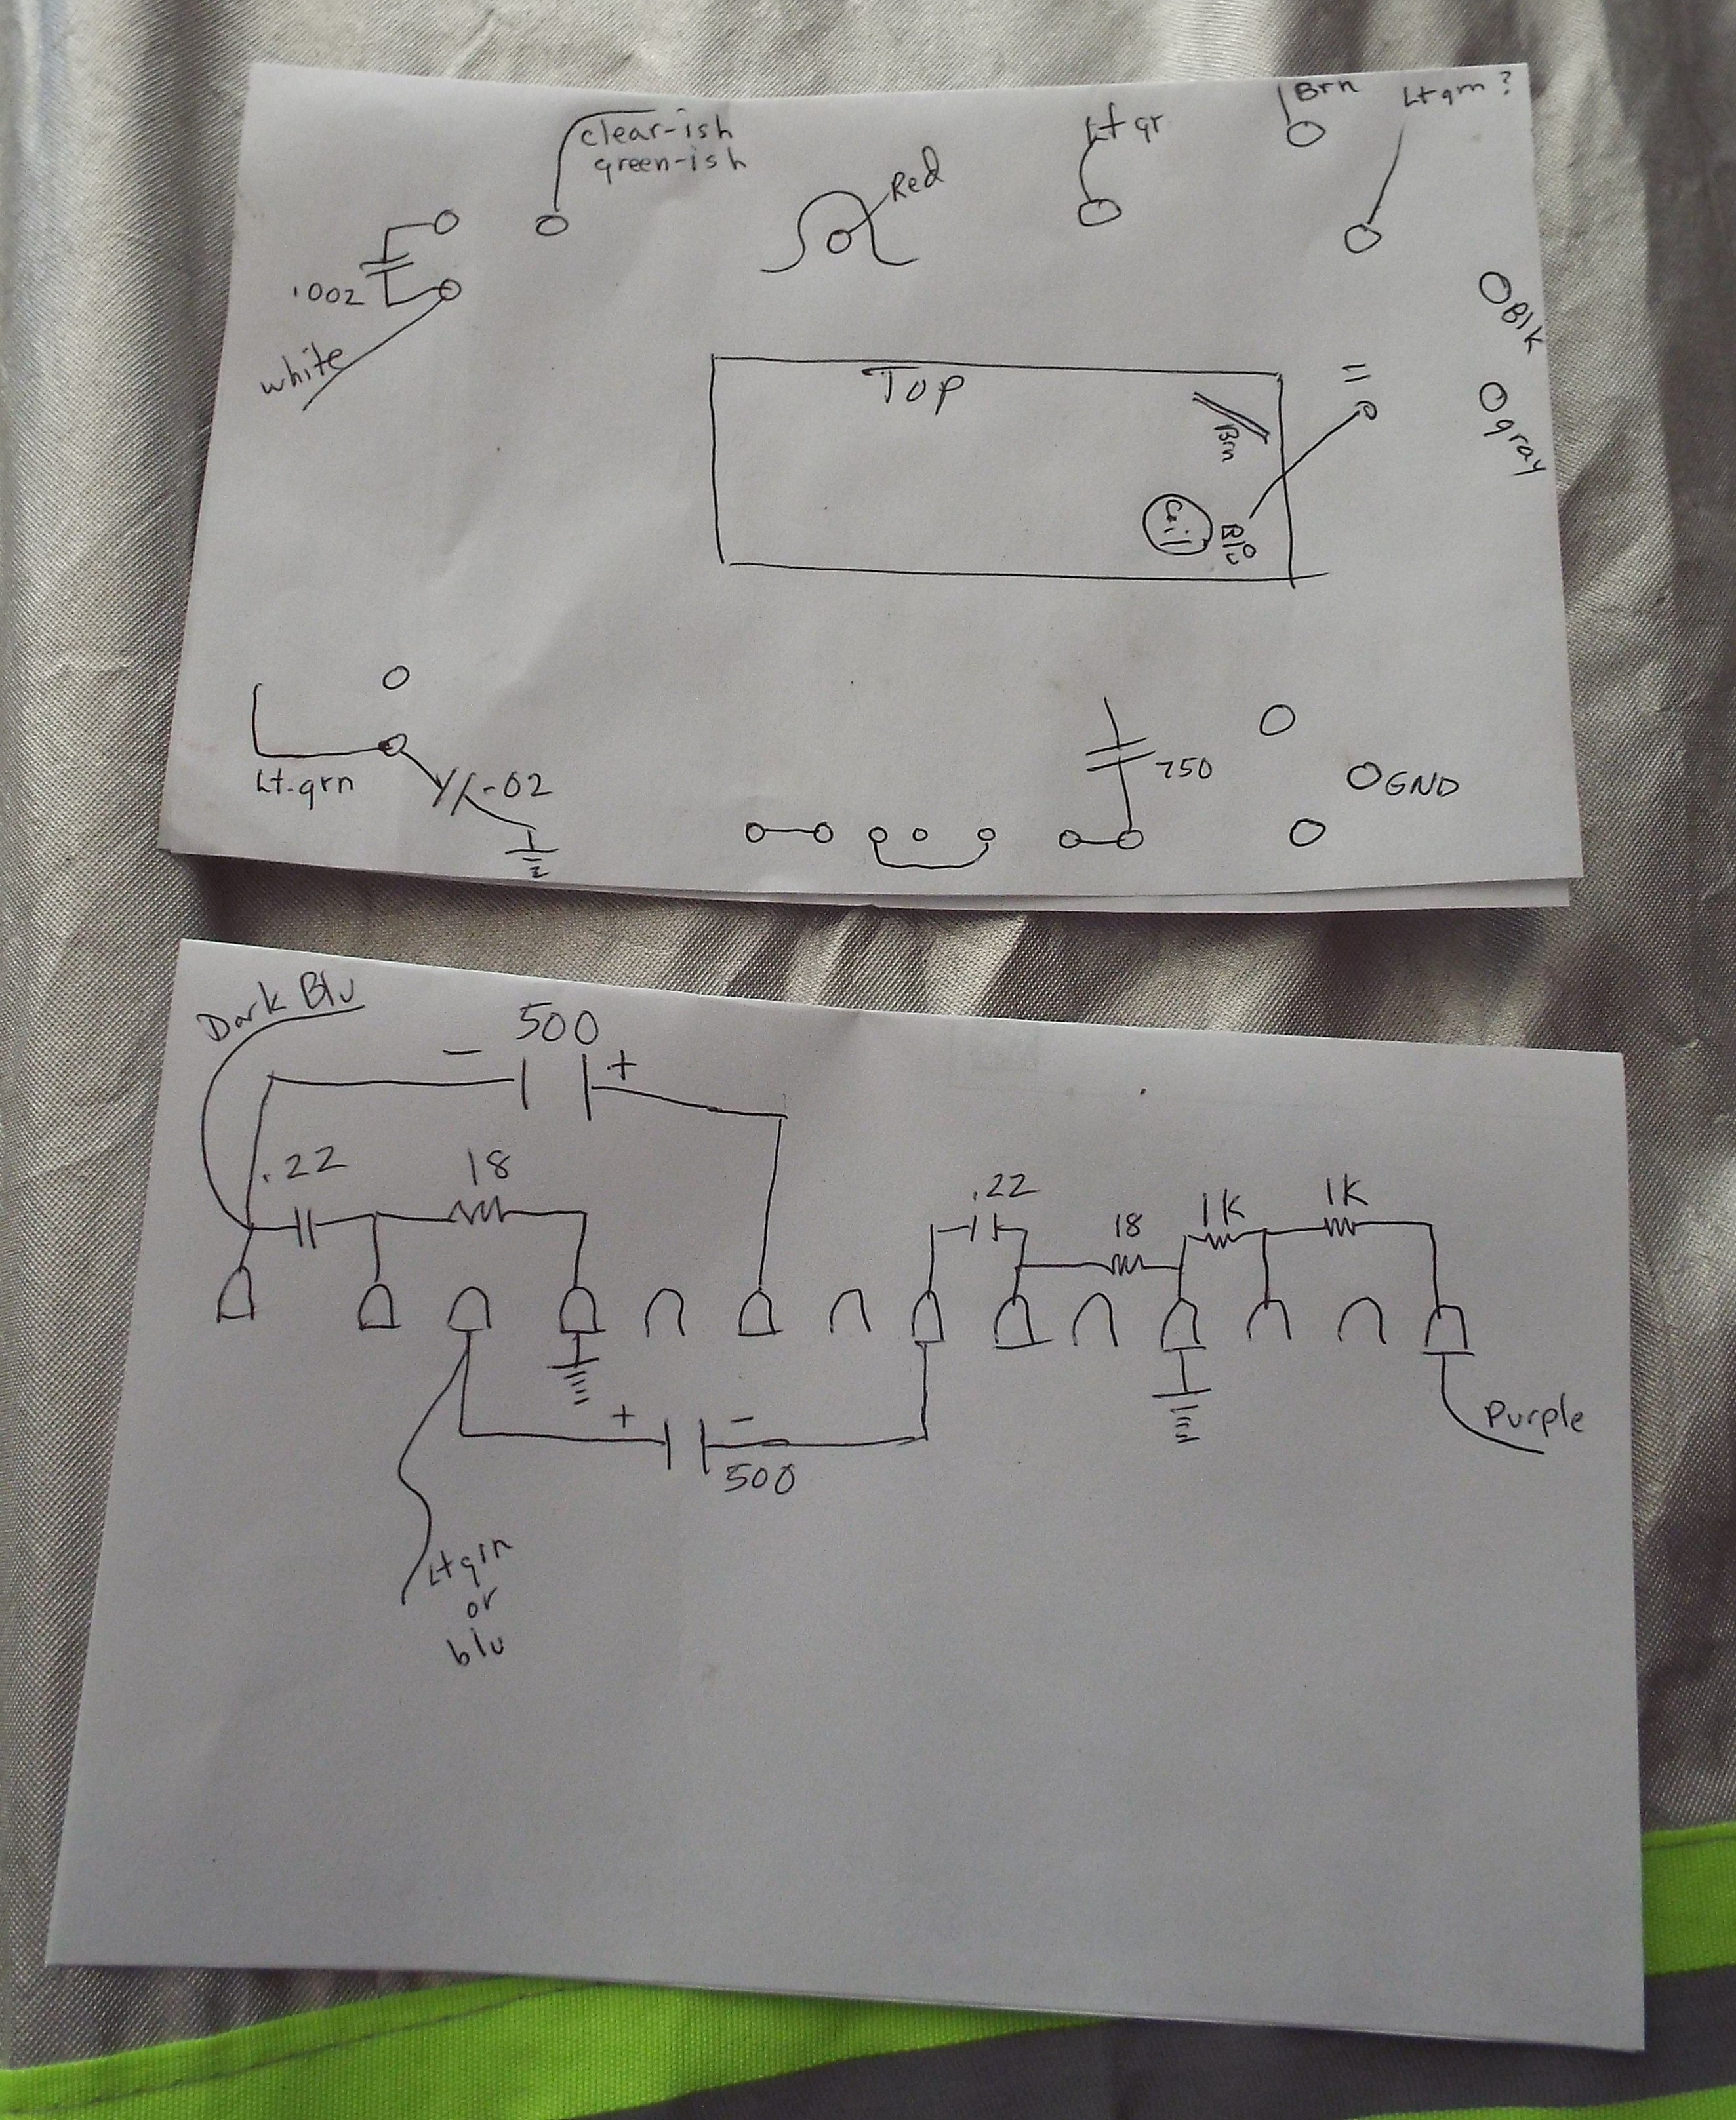
It’s a process,removing and identifying the capacitors including making sure to get the polarity noted. I make drawings and will also take pictures with the digital camera. I’ll then make a capacitor order with Mouser and once I get them installed then re-install the board. I did this process with another board as well. It is time-consuming but is an excellent way to make sure I get the right values and install the caps correctly. Most of those capacitors were 6 to 25 volts and unbelievably were axial. Were there not radial designed capacitors then ? I ordered radial capacitors and just made them all 35v. You can go up in voltage but never less. Modern capacitors are way smaller than those I replaced. The radials are much easier to install as well. The manufacturer of this SR500 put the positive end of the capacitor down and then bent the negative lead over into the board. What a mess. And speaking of messes I had to clean up someone else’s modifications. One of them were resistors in series with the speaker fuses and some hinky cap wiring. The manual I had from Victory Glass did not have a schematic. So I was left wondering just what was the correct wiring? I actually got an original Seeburg manual on ebay. When I received it I was more than pleased to see that it had a full schematic for the SR500. I was able to get pictures of Larry R’s SR500 to further verify just what the correct wiring was. In addition I replaced an unmatched pair of output transistors with a matched set to complement the pair already installed. I finished the amp last night and bench tested it. Lots of volume and tone. Balance control is equal on both sides. AM radio picked up a few stations. All I could want!
And so today I hauled the mechanism in and will start on it. The first thing I have to do is install one of Sean Boyers’ fine reduction gears into the scan motor. I found out the middle gear was broken when I was working on the HSC2 which also had a broken gear and looking for a replacement. This mechanism won’t get literally washed like I do the 45rpm machines but will get a good cleaning nonetheless. After oiling and any adjustments I’ll connect 115vac and see if I can make it run correctly. I have a feeling this Seeburg Big B will go together fairly quickly and easily. I know I will run it for several hours to ensure it works correctly before letting it go.
