Mechanism Time !
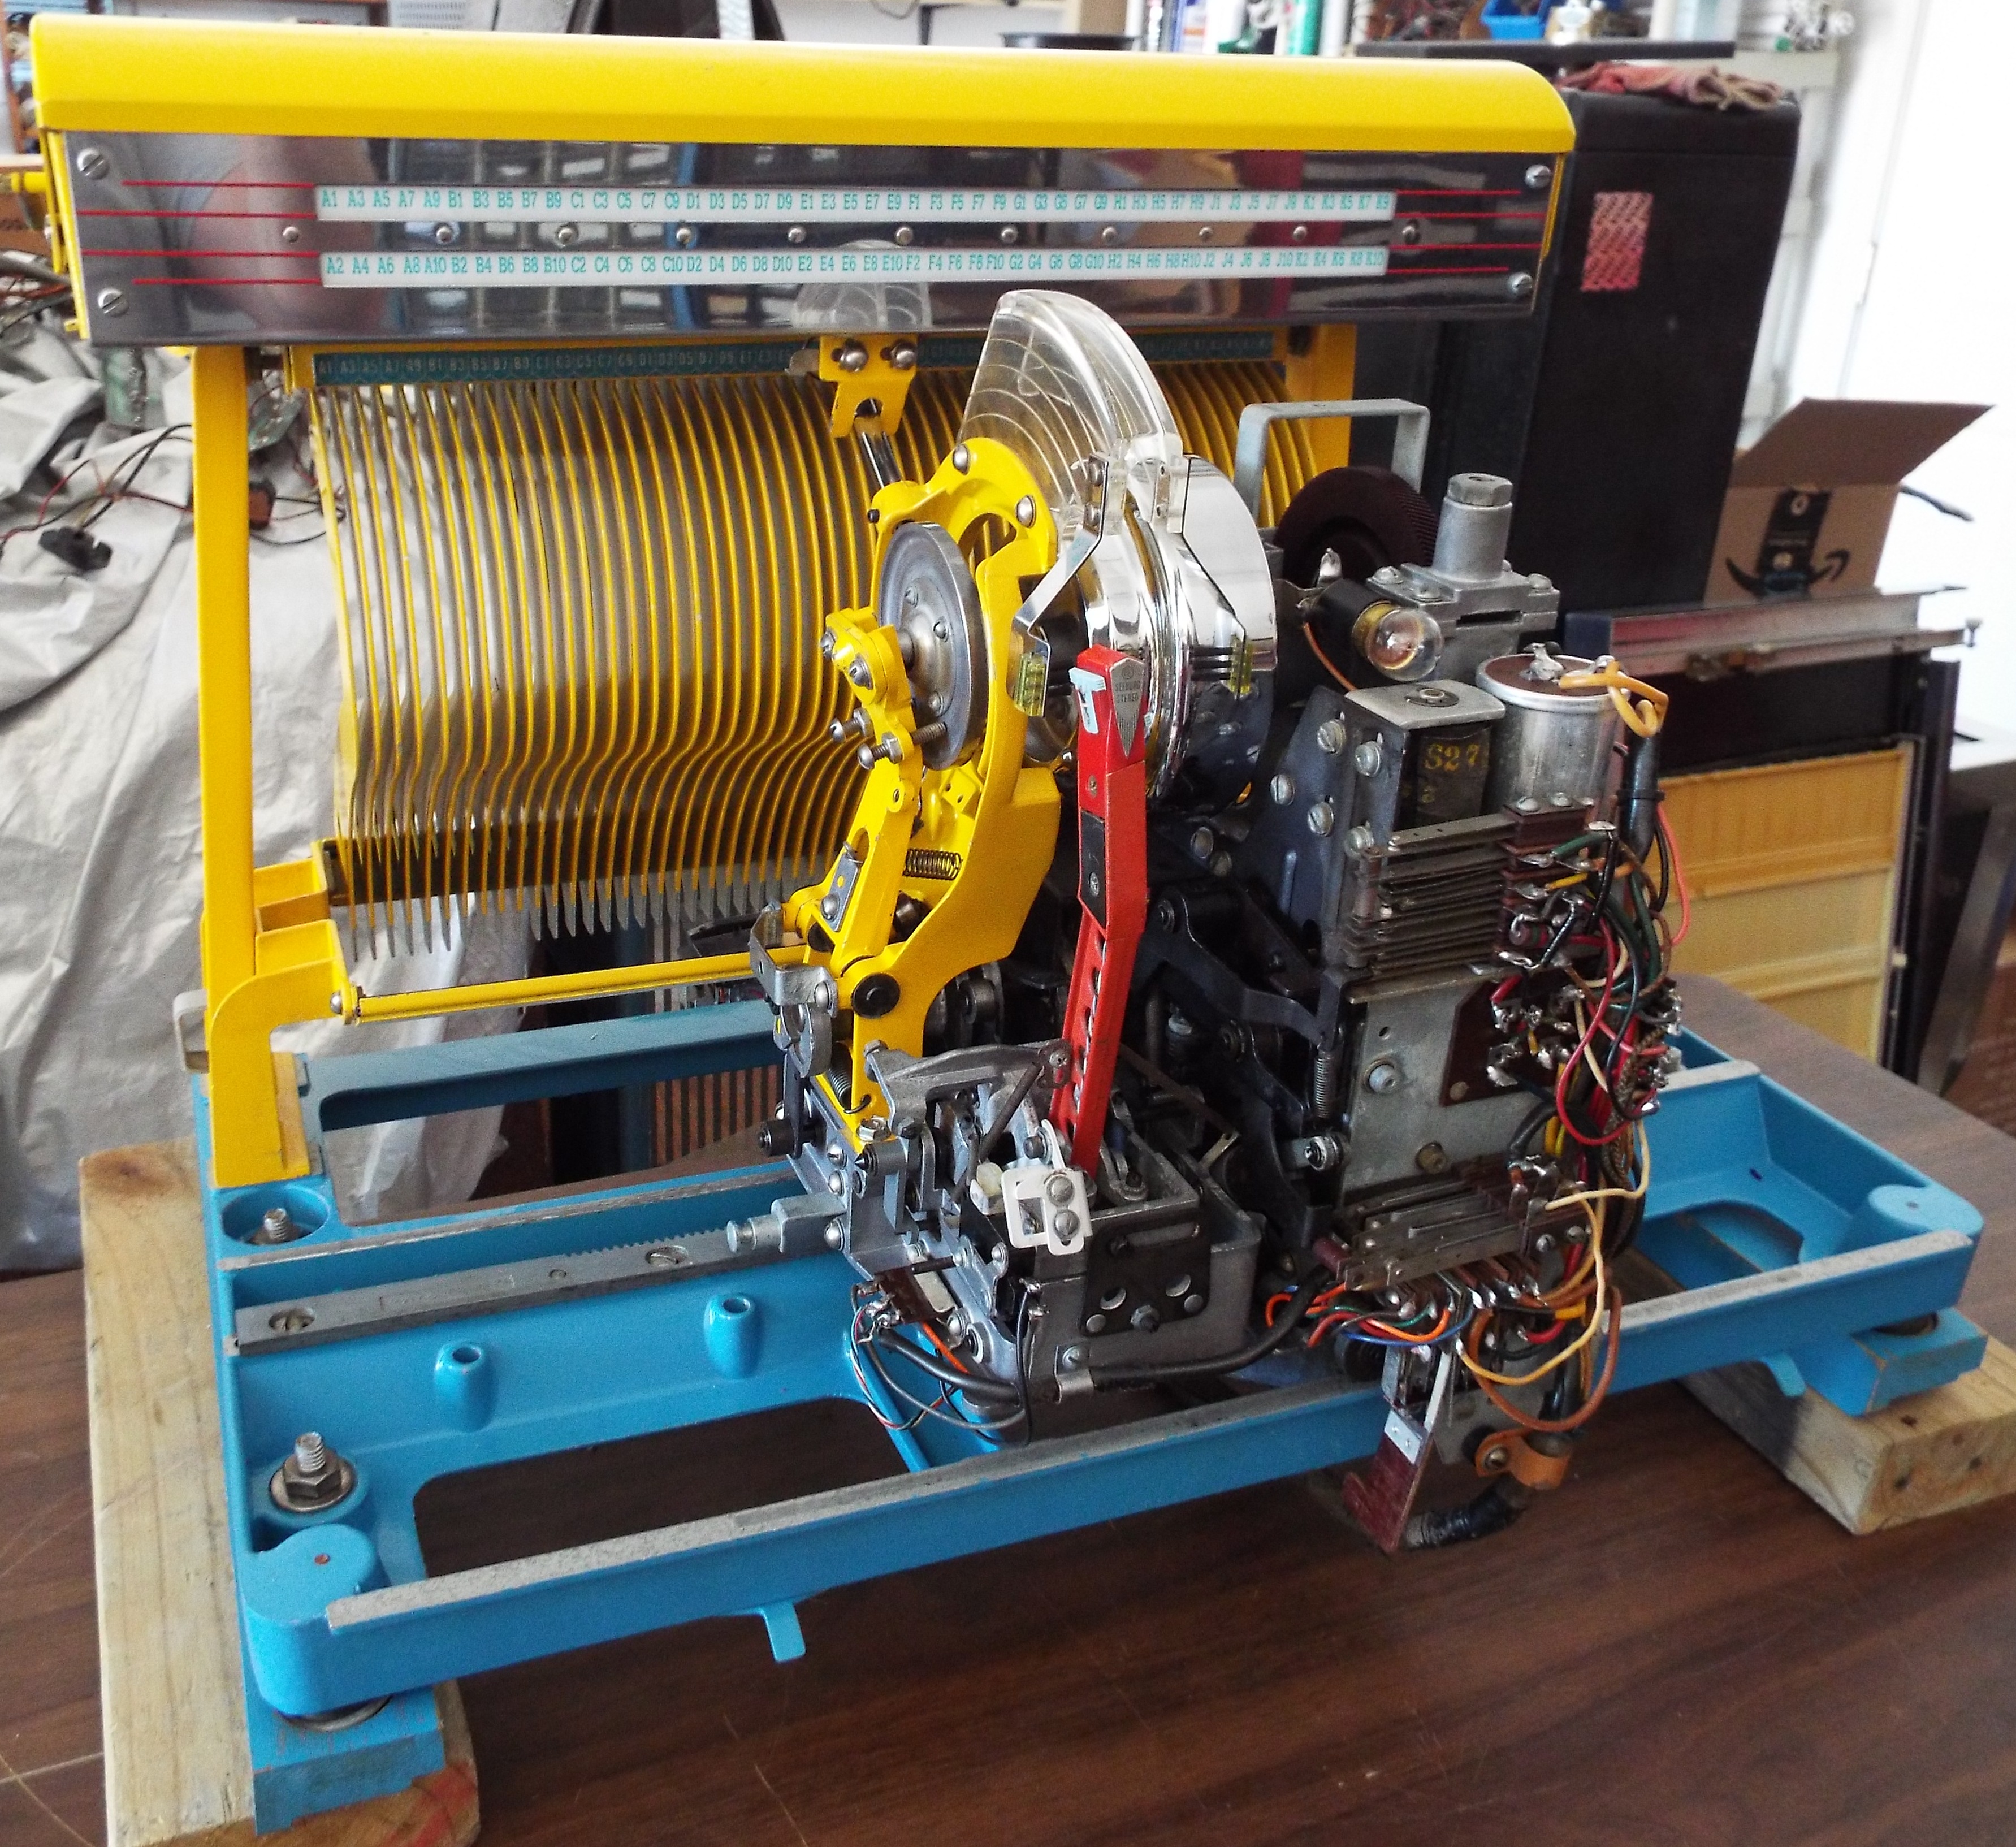
I gave the washed C mechanisms almost a week to dry. It’s not very hot out at all but the humidity is real low and this helps dry parts out very well. Of the two C mechanisms available I chose to use the B mechanism that came with the Pretty C. The base is real nice and it has less problems than the Parts C mech. The turntable is very nice. Actually the chrome on it is outstanding.
I took all the painted pieces off of the mechanism as they were getting replaced with the best yellow pieces from the two parts boxes. I like tearing a mech down this far. It allows easy and very thorough cleaning. Putting it back together is just a process. One that I have been doing for decades. After doing touch up cleaning, basic lubrication, and inspection I started with the tonearm assembly. I did a tonearm swap from the stock redhead mono to a redhead stereo cartridge. This is one of my favorites to do on the 100 Select machines. The stereo cartridge uses a lot less spring pressure than the mono and the T needles used with these cartridges work much better with modern records than the mono needles. Stereo style needles for the mono redhead were available at one time. I’m not sure about their availability any more. They can easily be recognized because of the right angle bend in the stylus arm.
I have several of these stereo tonearms and cartridges saved for just this purpose plus many good used T needles to use with the cartridge. This is the redhead cartridge used from 1959 up to 1966. The 1967 Showcase or SS160 was the first to use the 340 stereo cartridge. I have a ton of those too. Given today’s needle availability which is extremely limited, a very good option is an original used pair of Seeburg or Pickering needles. To this end I have been buying up used Seeburg needles for years on ebay. No one really took these into account and I have picked up several hundred over the years usually at an extremely good price. They get cleaned and inspected. Some of the used ones always turn out to look almost new with practically no wear. I have sold many good used needles and was told repeatedly by a happy customer that these original style needles sounded way better than whatever new needles they replaced. This is an easy swap as both types of tonearms use the same mounting and trip switch assembly and of course the basic tonearm assembly hasn’t changed…. ever. All one has to do is run both signal wires together and both ground wires together for the mono amps. I run the cartridges at 3-4 grams pressure using the Neuses gauge.
I picked out the best stripper plate and clamp arm assemblies and used these in place of the hideous half red half yellow pieces that came with the mechanism. They both look extremely good with bright original paint. I took the clamp disc apart to clean with steel wool and lubricate. The pivot block gets a dab of molybdenum behind it. All the screws got a quick ride on the bench grinder’s wire wheel. Makes ’em shiny ! I removed the clamp arm switch and ran a new ground wire to the indicator block. That switch is for commercial use. If there is no record in the selected spot that switch will trip the mechanism so that it can pick up the next selection rather than spin in place until someone uses the rear reject switch. I had a little fun with the brake cam. I was installing the roll pin that holds it in place when the pin stopped. I’m not sure why but the holes in this brake cam did not align with the holes in the camshaft. I managed to get the roll pin back out and used another brake cam that did match up.
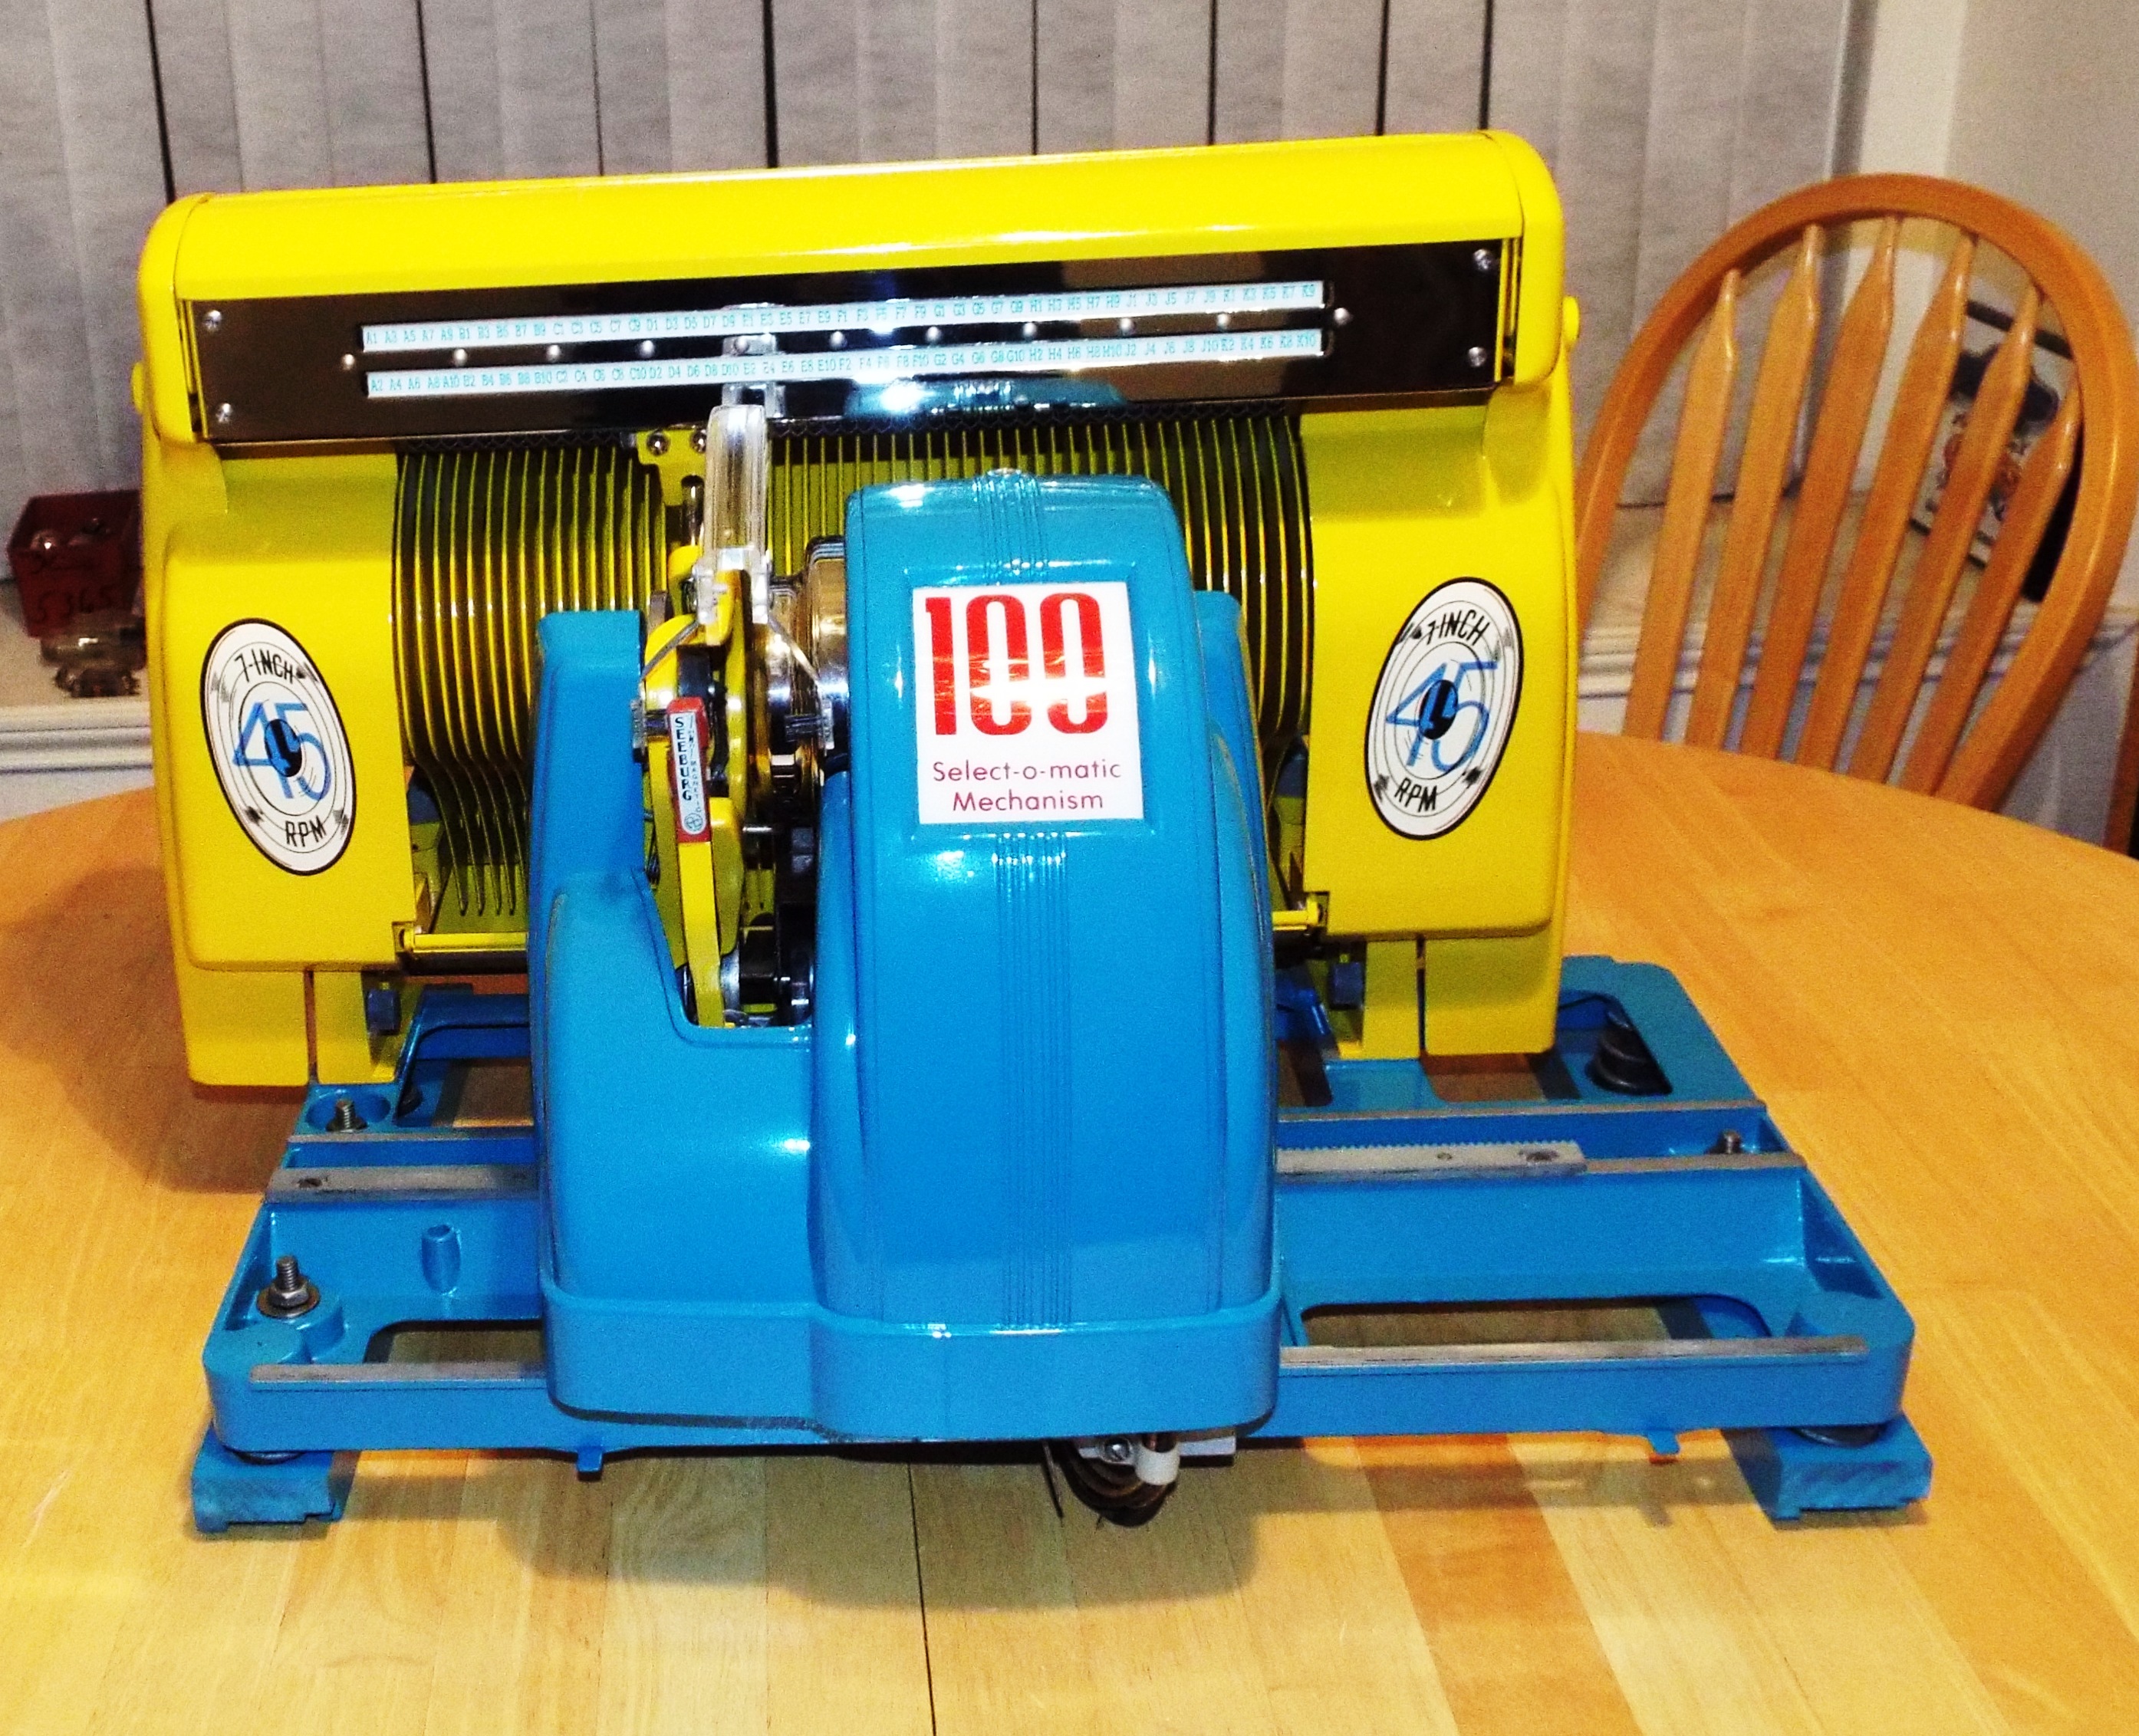
I spent an inordinate amount of time getting the record rack clean. I’m not sure which parts machine it came off of but it has sat around for decades gathering dirt. Several times I inspected it after drying only to find more dirty spots. It did eventually clean up extremely well. I’m real pleased with it. I used a new record rack letter/number strip from Victory Glass in place of the old one. The pop meter strip got replaced as well. A new stripper plate top or brush holder assembly was used as well. After installing and adjusting the clutch I mounted the record rack and aligned it.
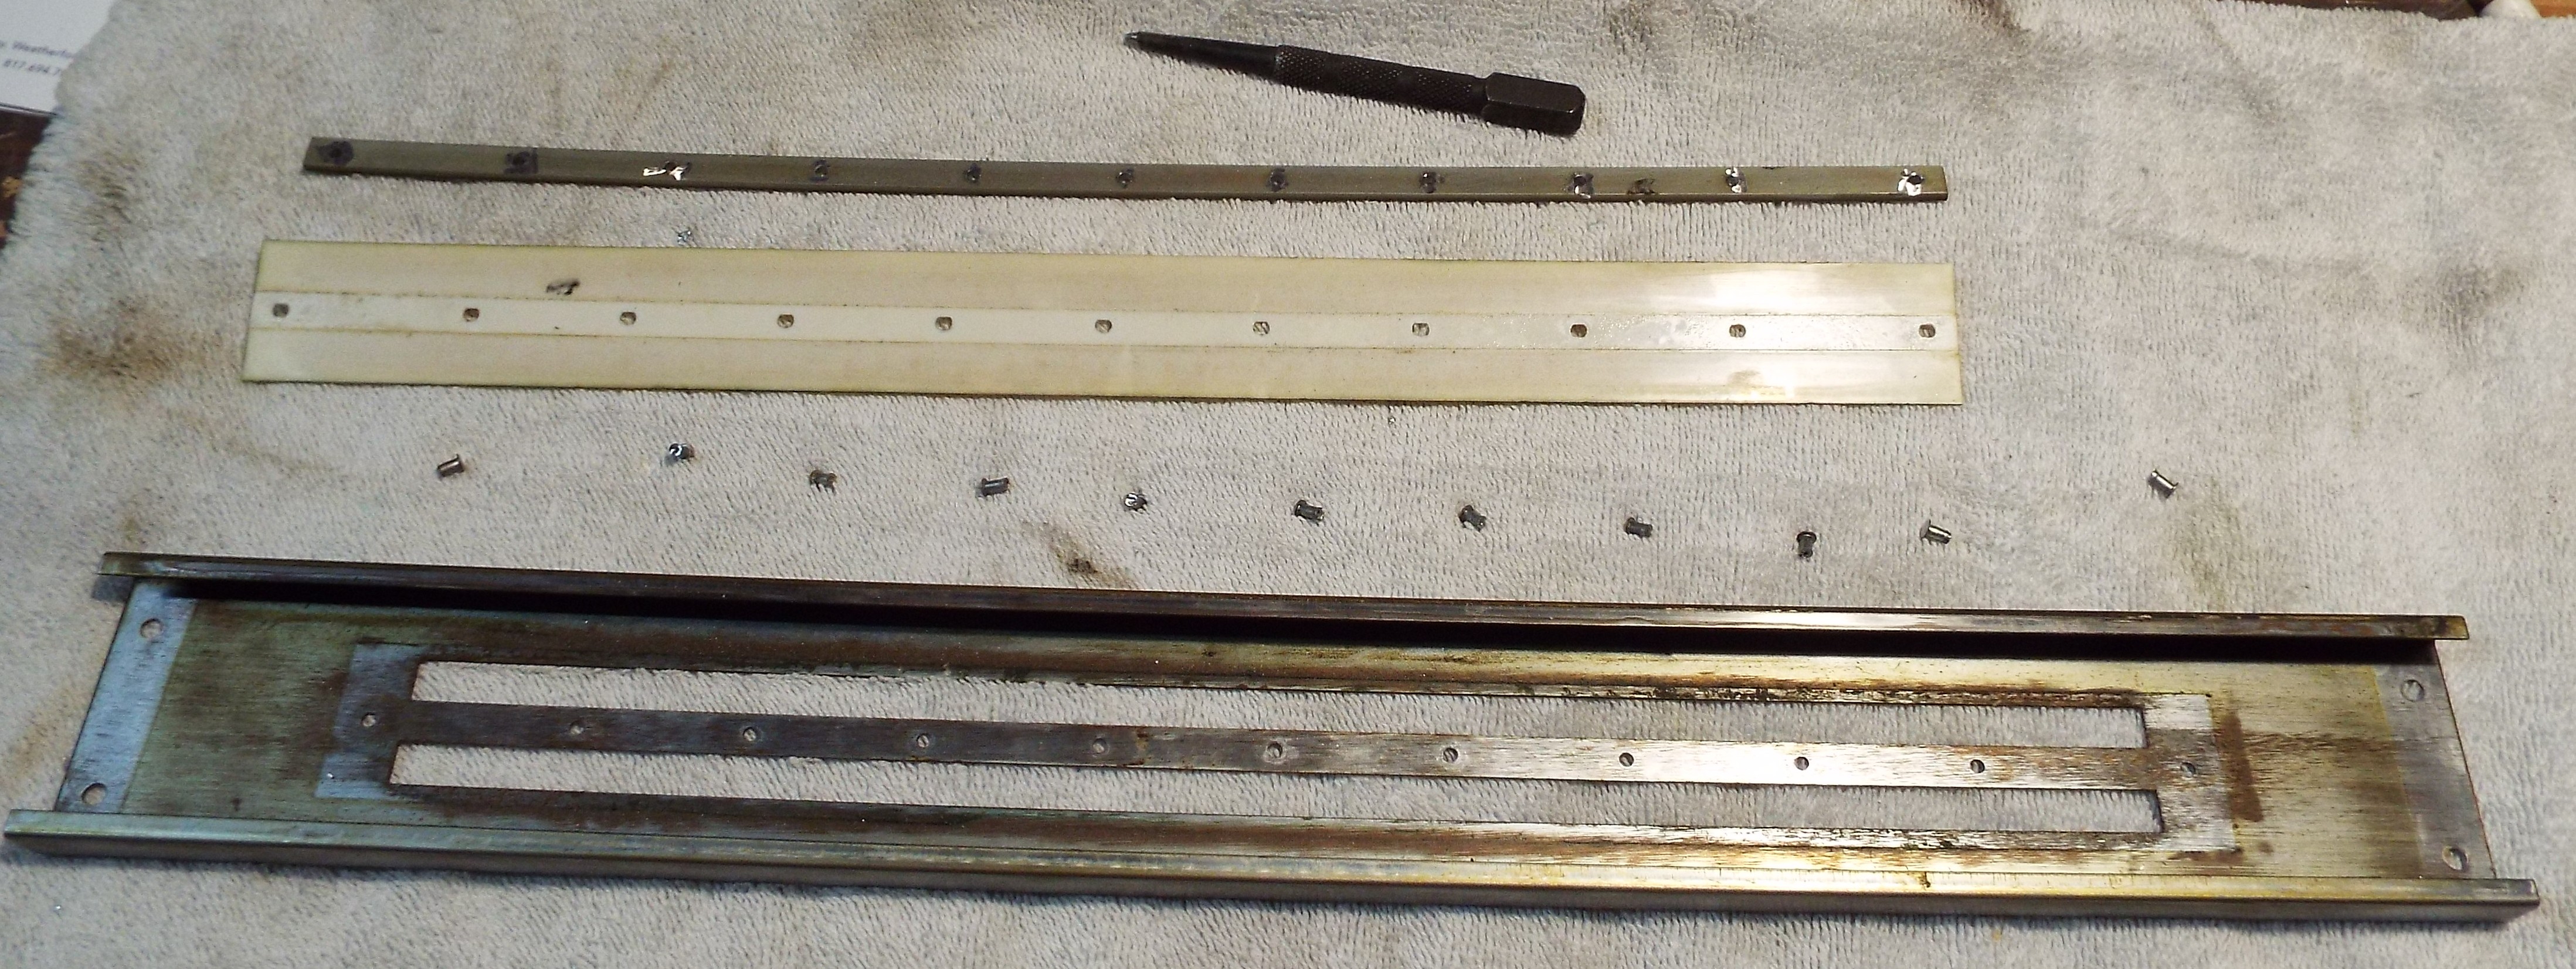
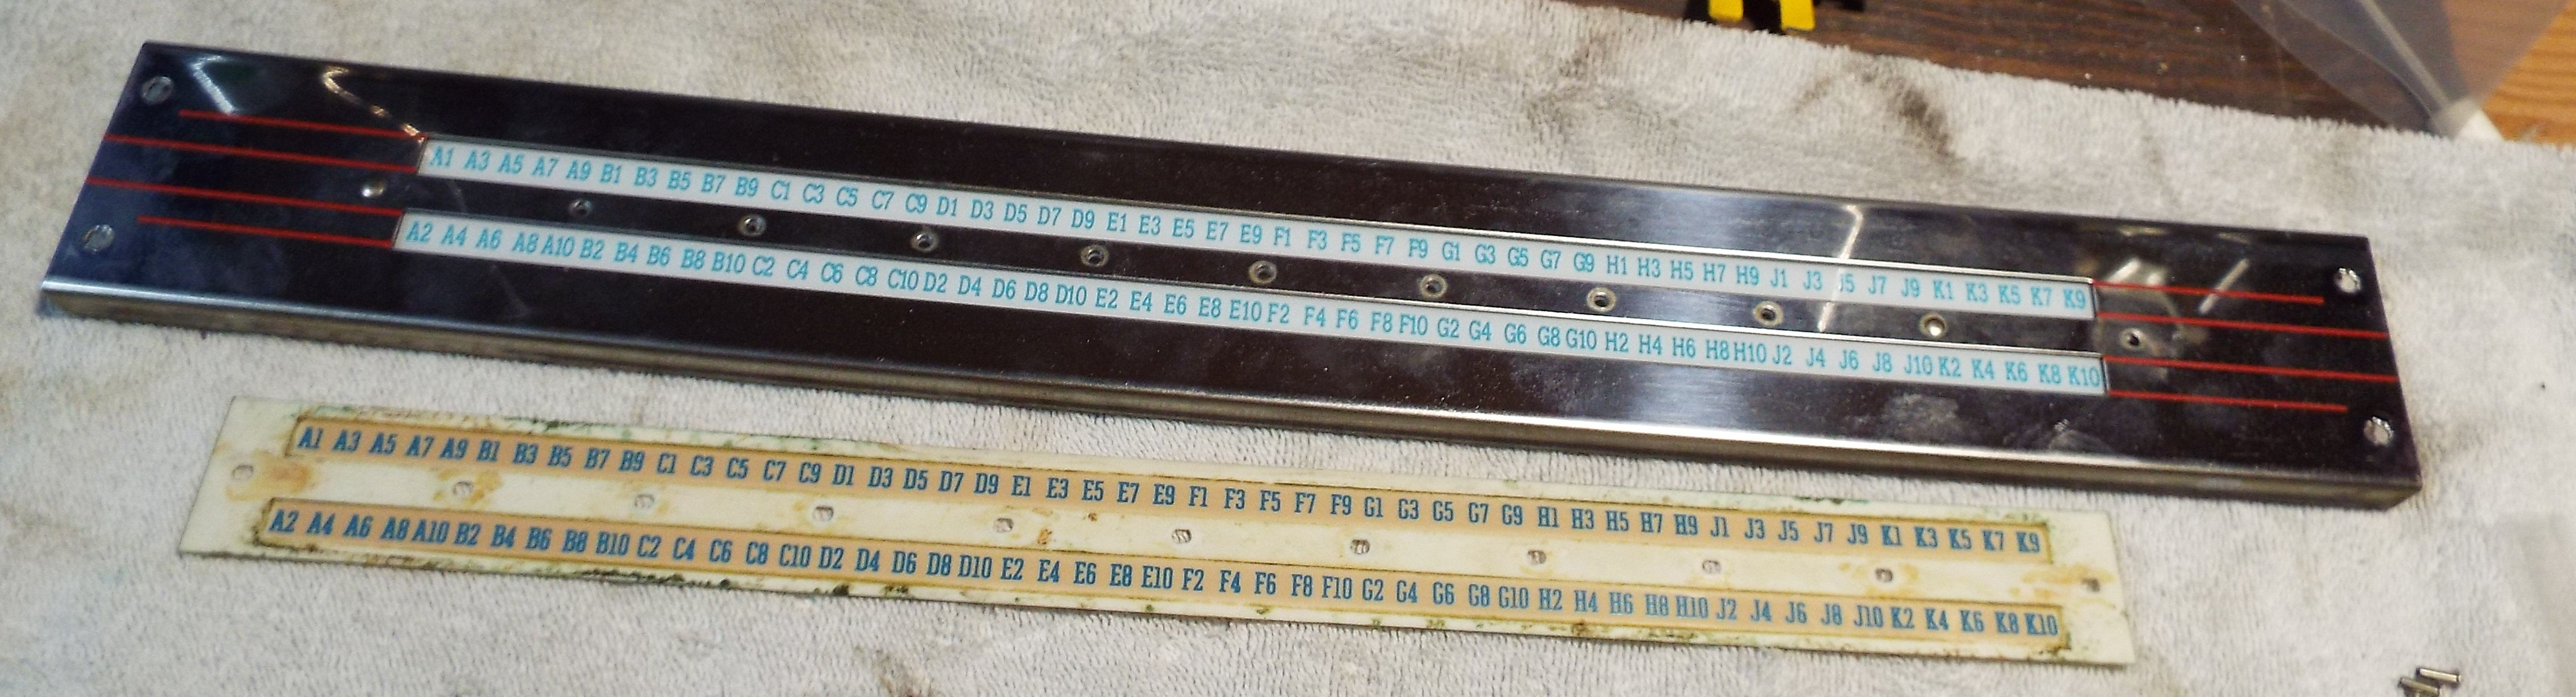
The red stripes and chrome on the original indicator channel are in excellent shape. The plastic indicator strip was original and looked its age. I have replaced these several times on restorations and it was just a tedious chore. What made it a chore was that I always had to use slightly oversized rivets to re-assemble the pieces. There are three pieces that make up this assembly. The chrome channel, the plastic number strip, and the thick metal piece that holds the indicator strip in place. After drilling out the old rivets, in itself a careful process, I used to have to drill the holes in all three pieces out with a 1/8″ bit. One must be very careful when doing this to avoid damaging the cosmetics. I’m pleased to announce that Victory Glass sells the correct “long rivets” as they call them. These are the same size in diameter as the original rivets-no drilling! They stick through with just enough to carefully flatten with a flat faced body hammer against the iron vice. It took me less than half the time than it used to. Replacing this plastic is more of that “attention to detail” that really defines a restoration.

Now that I had a good channel it was time to take care of the indicator block. It has two functions. One is to slide along with the mech showing which selection is currently being played, A or B side. The other is to operate the pop or popularity meter. Once again the pop meter is for commercial use. An operator could come in and with a glance know which records were not doing well and so have candidates for replacement with the new hit wonders of the day at his disposal. I removed all the pop meter stuff which basically amounts to the coil assembly. This coil uses the same circuit as the pinbank reset circuit does. The coil pulls a plunger up and moves the pop meter dial for that particular selection one tick. Removing this coil assembly lightens the indicator block quite a bit. Less noise as it slides along in life, less chance for any electrical problems.
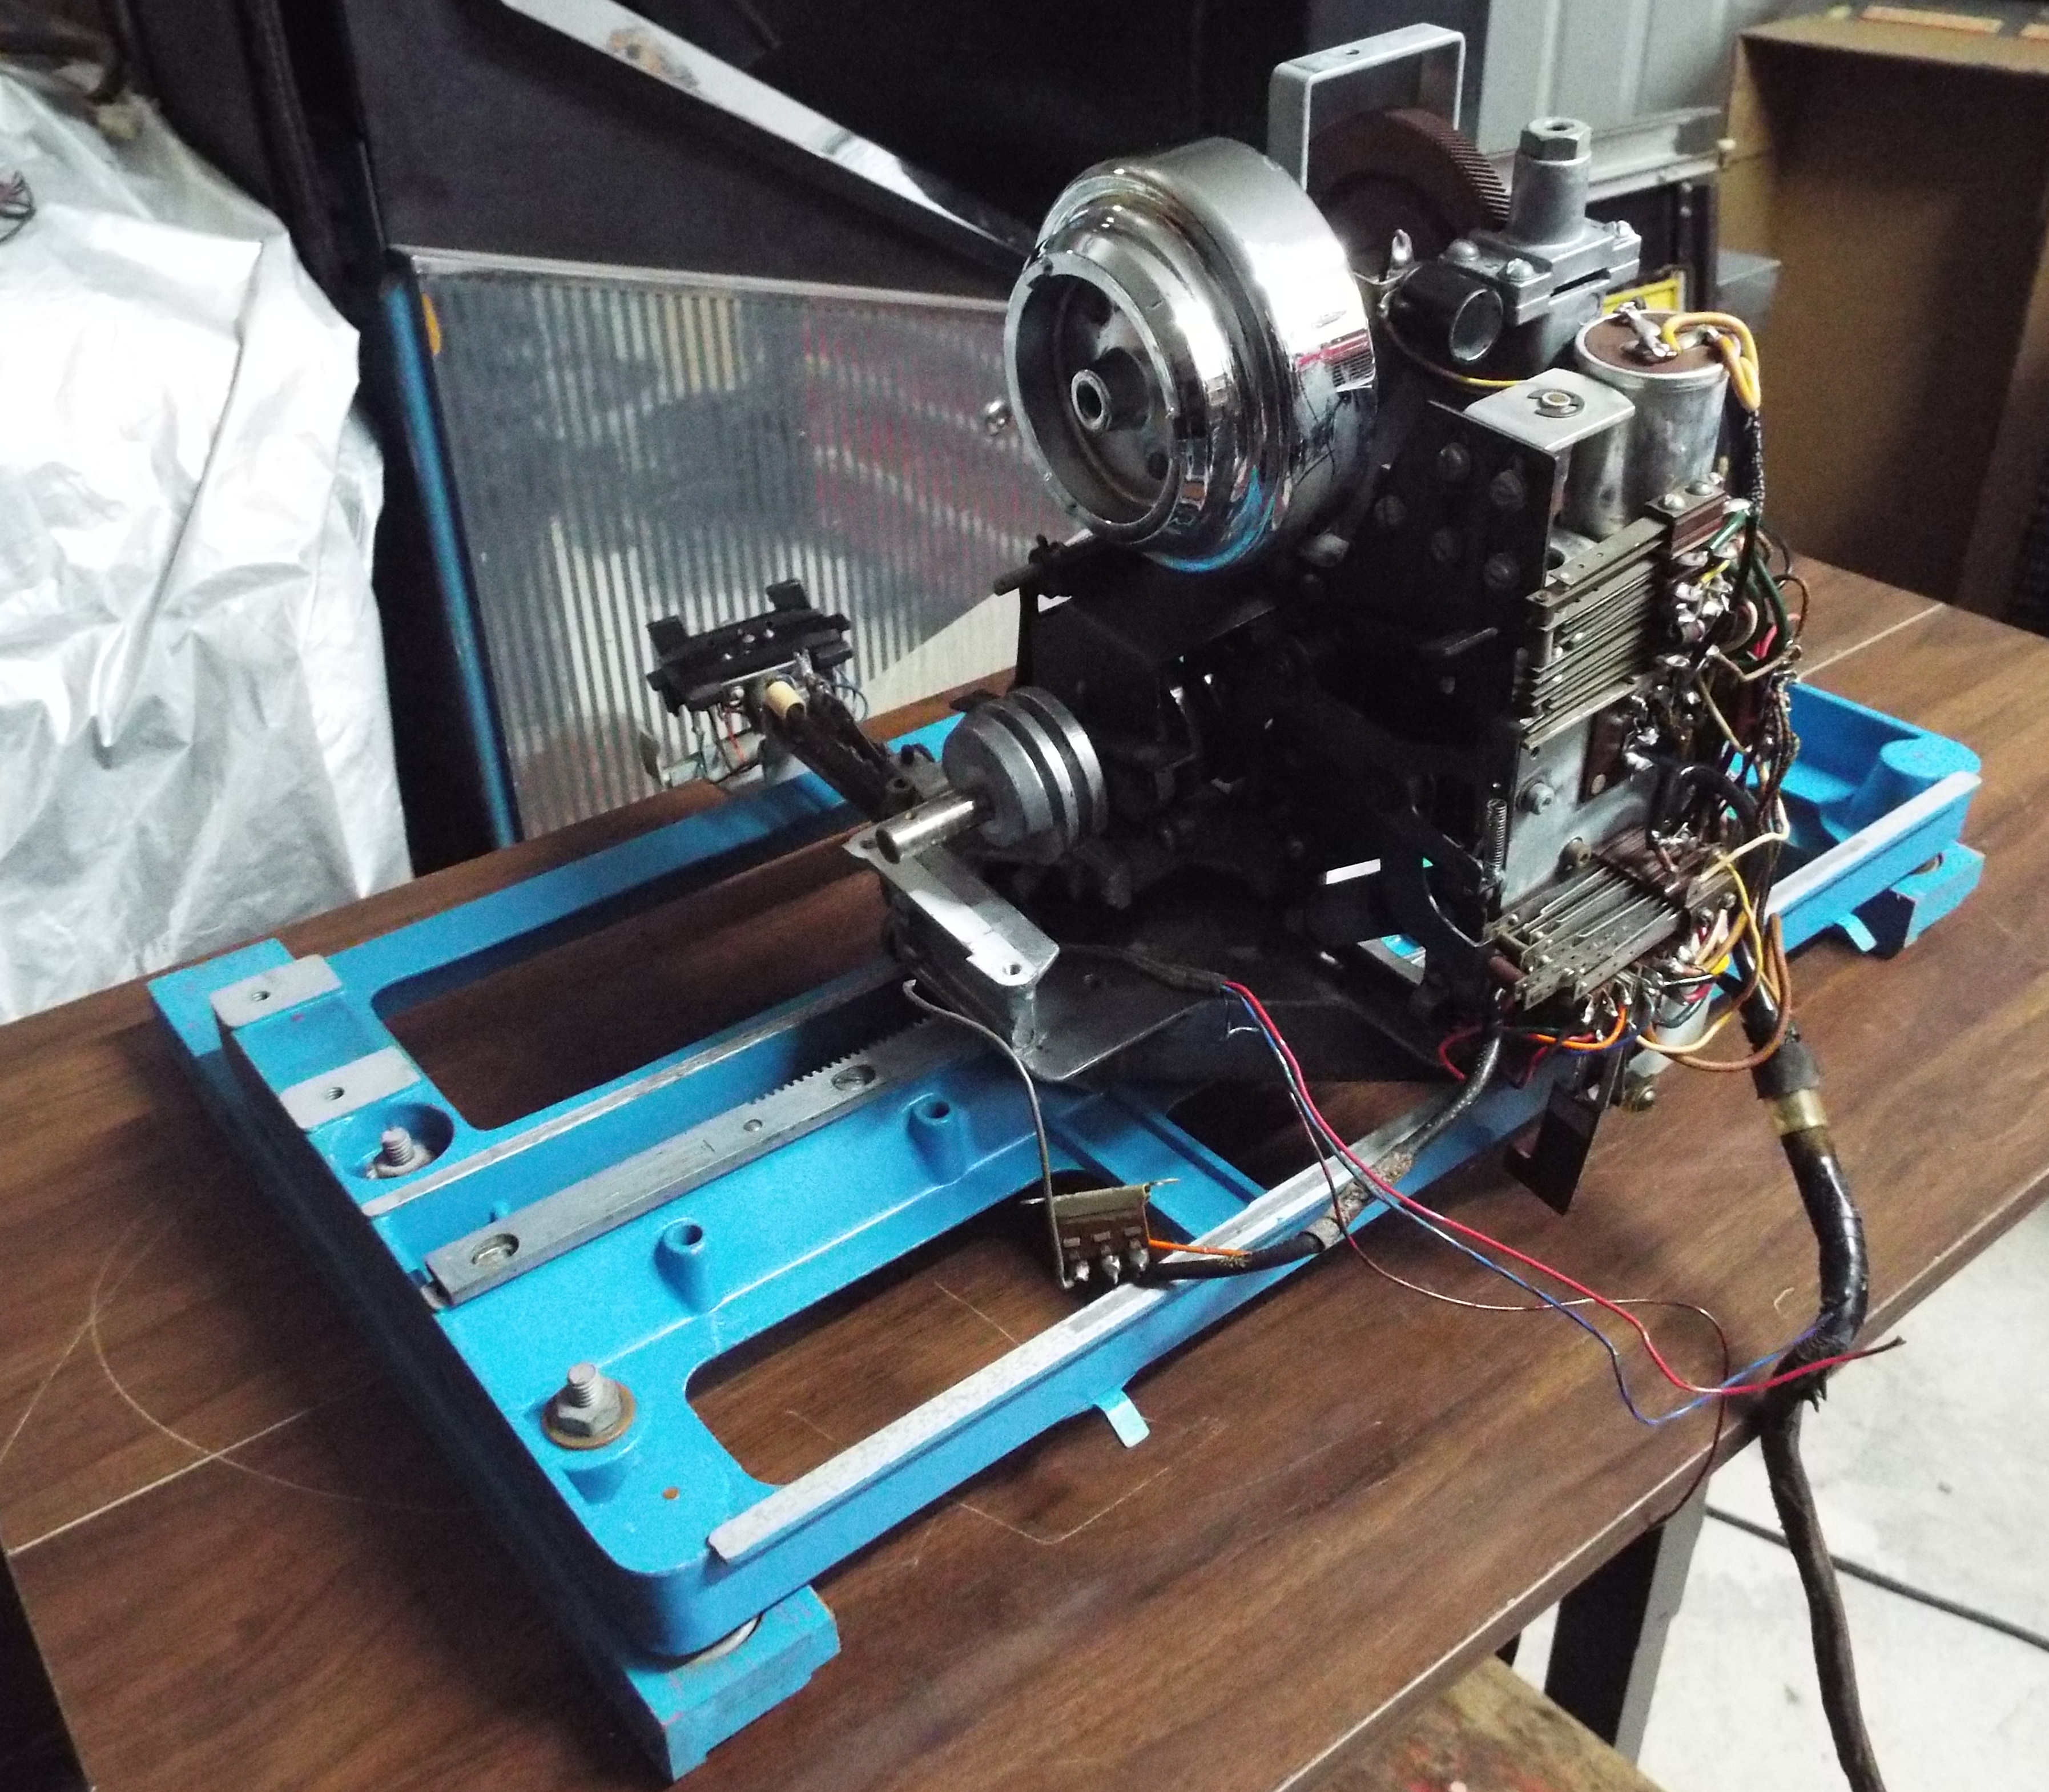
The rest of the mechanism assembly was pretty standard stuff. I had to replace the motor and used a new Johnny Velchoff motor couple with it. This fellow makes high quality motor couples at a very good price. The trip coil was replaced as the old one had physical damage. New reject switch wires were ran. All switches were cleaned and adjusted. The pinbank contact block was attended to with commiserate cleaning. The mechanism looks really good. I ran it on the bench connecting 120vac to it at the reverse switch. I run it back and forth listening and watching. I manually trip the mech several times in both directions to ensure all is OK. The mechanism got placed in a safe spot with a towel over it awaiting a cabinet to place it.