Craigslist Treasure Time
Occasionally I’ll cruise craigslist Dallas and Marketplace looking for jukeboxes, Seeburgs of course. I do it only occasionally because I’m afraid I’d find one I just had to buy. I am at zero storage space except for the emergency spot behind the sofa. It is reserved for truly deserving finds like the restored 1953 Seeburg G I found for a song last year.
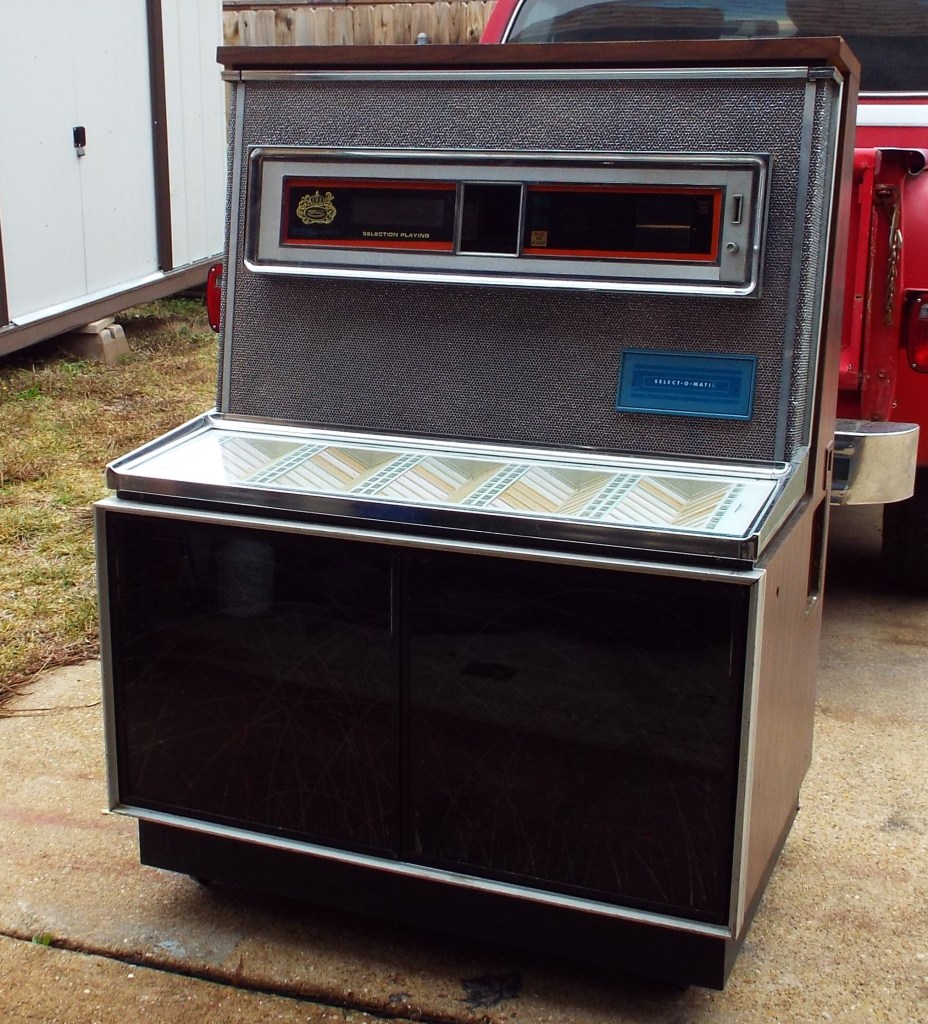
Last week I found a 1969 LS3 for $125 on craigslist. It is the first digital box Seeburg made and as such the electronics parts are good on jukes up to 1984. Most any box, for parts, is worth a $100 or so at least. Had it been an earlier model I’m not so sure I would have bought it. ( I would have) I knew as soon as I saw this one that if I were lucky enough to get it I would part it out and so wasn’t worried about storing it. I called a few times and left a message. That weekend I called again. No luck-just went to voice mail. At this point it could have been sold and the ad not pulled or maybe the guy was out of town. Who knows. I do know you can’t give up and if you want something on CL or Marketplace you better act fast.
Monday morning I called once again and reached Mike. He works for the owner of the jukebox and told me a few particulars about it. He gave me the address, close to Greenville Avenue and Forest-not very far at all for me in Mesquite. He said it could only be picked up on a Sunday. This was a little dismaying as the early bird gets the worm and I didn’t want to be scooped. I expressed this dismay so he called the owner who said I could get it Thursday between 10 and 11am. Cool! Strange, but cool. Got the address, I’ll be there. Oh, he couldn’t help me load it. He hurt his back. The owners are old, the man had to use a walker to get around. This is a difficult box to load. Besides it being heavy at close to 400 pounds the center of gravity is very low and it is a high-backed juke.
I had a plan though. I arrived in a timely fashion, introduced myself and went over the box. It has a good looking cabinet. I was mainly making sure the juke was complete including the cartridge. It was, so I started rolling it out. It rolled like a typical Seeburg which is to say grudgingly at best. I got it on the patio and started disassembling the box. I took the control center, amp, mechanism, black box, and the front doors off. This lightened it considerably but was still a load. I got it down the wheel chair ramp and leaned it on the tail gate of my truck. Mike was actually able to help just enough that we got it loaded on its back in the truck. I stacked the rest here and there, made my goodbyes, and left.
When I got it home I unloaded the separate units and stored them under and around the Camaro.Then the fun part-the cabinet. I can get it to the balance point and slide it down the tailgate. But then I have to get behind it and pull or push it back up on all four wheels. It was all I could do by myself to get this one up. My back hurts today and will for a couple more. That reminds me…time for some strong medicine. God bless hydrocodone!
These cabinet style jukeboxes from 1962 to 1969 are just a pain to work on and don’t bring a whole lot even completely refurbished because they just look like a squarish box. Very little in the way of adornment. The whole jukebox industry went down that path with a lot of Wurlitzers attempting to look like a piece of furniture. They pretty much succeeded. So I just refurb the different units and sell them separately. I can actually get way more for the parts than I can for a working LS3 with a lot less hassle. Everything is real clean and I anticipate minimal hassle getting any of it refurbished. Usually I’ll strip a box as much as possible but this time I left the doors on it in addition to the power, lighting, and speaker wiring in place. I have it advertised for $50 for someone to make a wine cabinet out of or a wifi thingy, or even a fish tank. If no one bites after two weeks I’ll roll it out to the alley and advertise FREE Alley Treasure on CL and it will disappear quick.
Free fish tank
