HSC1
I finally have a chance to start on the HSC1 or the Home Stereo Console unit I dragged out of East Texas. I had no room to store the whole console and so I gutted it onsite and brought the innards home. These are a very big unit that holds and plays fifty 33 1/3 albums just like the 45 machines. I can select sides individually, or push a button and have All Play which is just what it sounds like-playing all 50 albums one after the other. If you accidentally hit that or get tired of the selections you can easily choose Clear and clear all selections. These units are basically comprised of the mechanism with record rack and tormat, the selection system, and the combination amplifier and AM/FM radio. I had one of these in my Seagoville shop for years and used it often.
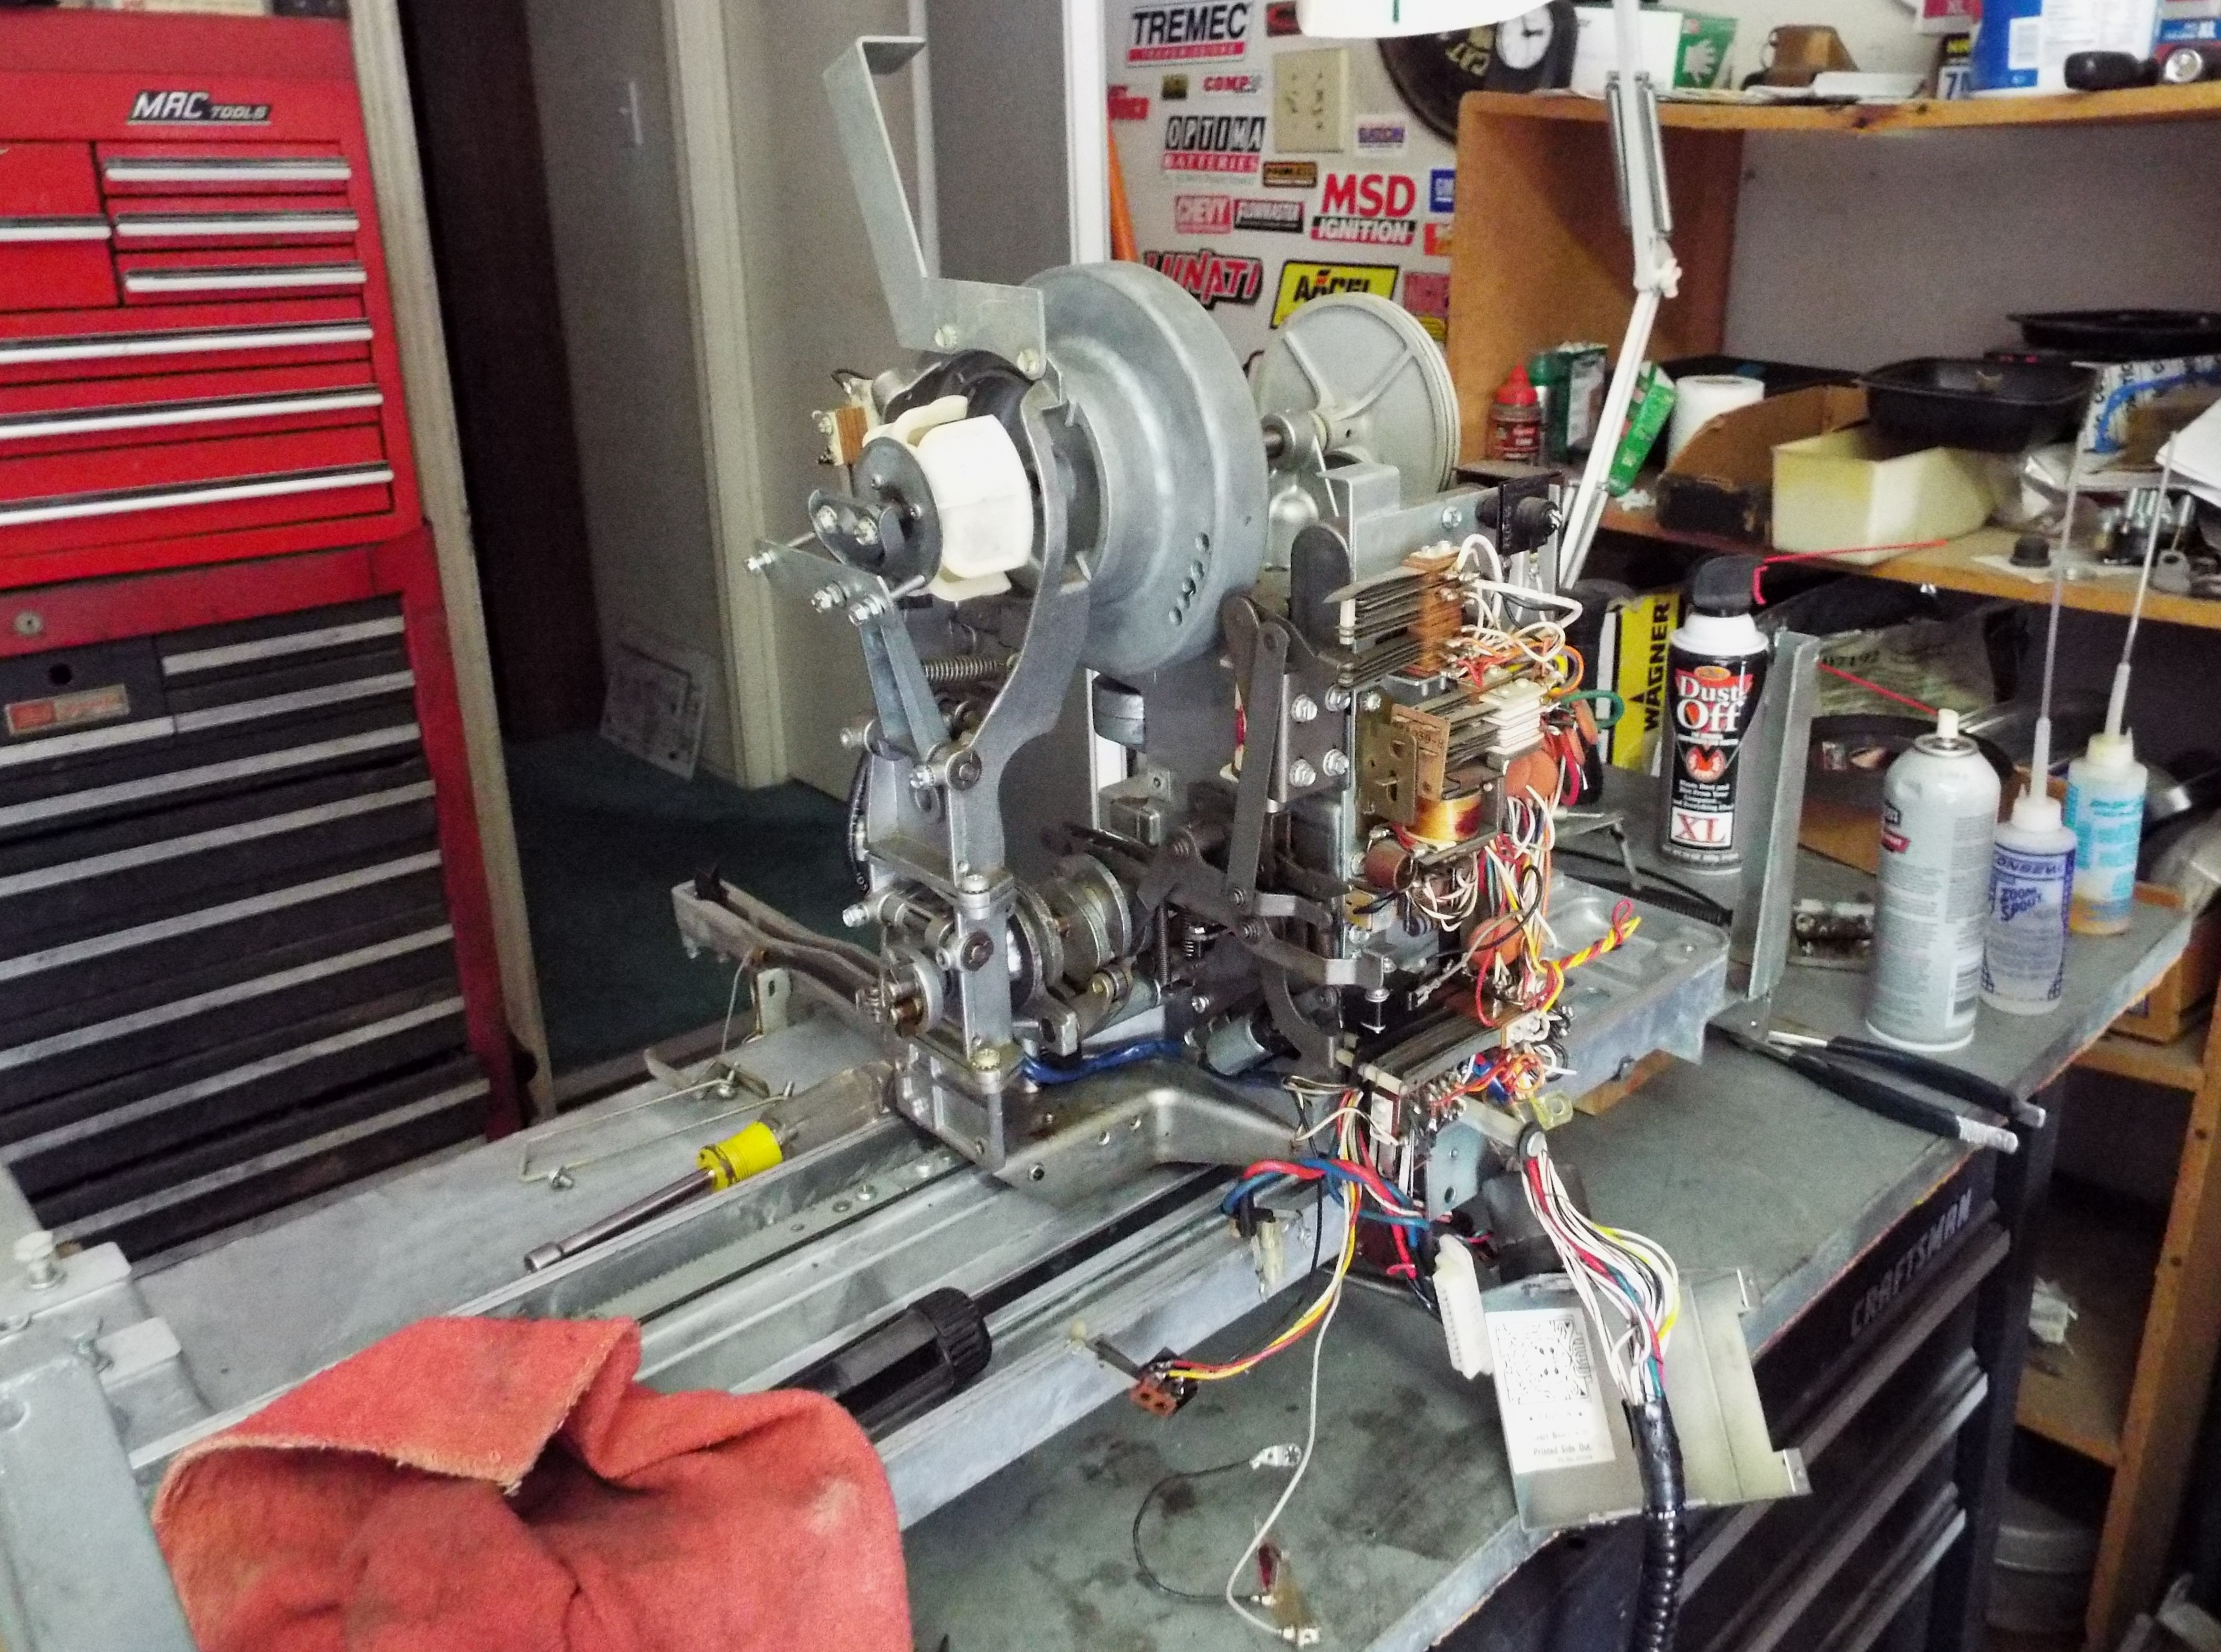
I started with the mechanism just as I normally do with the jukeboxes. This thing is big! The mech is pretty much the same as a 45 mech with a much longer tonearm and a spacer for the clamp arm to raise it to proper height. The motor is quite different. There is no way to turn it by hand. Seeburg made a special tool which of course is no longer available so I made my own. I made the first one out of aluminum which was a big mistake. It just bent when I tried to use it. The next ones were made from 5/16″ steel tubing. It’s easy enough to cut the slots with a Dremel. I got my buddy Russell to TIG the T handle on. This one works like a charm. It inserts in a hole above the clutch pushing down and engages the clutch to turn it and thus move the mechanism. The motor spins a pulley with two rubber rings that rotates the turntable. These are always shot; dried out and inflexible. I got the bright idea of using rubber O rings years ago when doing one of these but had no idea what size to use. I actually dragged a whole mechanism to an O ring supply company in Dallas, plopped it on the counter, explained what I needed and got the experts on it. I bought several and they work most excellently. The size and hardness for these is 8.234″ ID x .139″ CS or cross section or diameter with a hardness of nitrile 70.
It is too difficult to strip these mechanisms completely like I do the 45 mechs for washing. I scribed a mark on the tormat and rack and removed those from the base. I spotted a problem with the rack. The spacers are a thick plastic. When this unit got put away the mechanism lift arm wasn’t all the way down and had bent one of the plastic sidings permanently. I will address this later after some time to think about how to fix this. After that I removed the clutch which is the same as a 45 clutch only a lot shorter. Strange to look at. The tonearm assembly comes off fairly easily. Seeburg uses a pre-amp board mounted on it that is a little difficult to remove. I’ll rebuild this in an evening session. I went around and round the mech with a rag and cleaner wiping it down and getting it sufficiently clean. While doing this I examine everything closely looking for any problems. The base was typically greasy/dirty and I really wanted to wash it. When I say wash…I’ll spray it down with Oil Eater and scrub it with a toothbrush and then rinse with the water hose.
This mech comes off the base just like the little guys-remove the screws from a section of track and with the mech on that section lift it off the base. I was able to scrub the base down with Oil Eater and set it in the sun to dry. It looked great. The aluminum almost always cleans up very well. The clutch and tonearm assembly of course also got washed. I took advantage of the mechanism being off the rails to turn it over and oil the bottom wheel and the guide roller and spring assembly. After the base dries I will re-assemble the mech and clutch to the base, go through switches and try to run the mechanism.